Elevator Advertising Sizes: A Comprehensive Guide
2025-07-17Tianci MediaViews:164
Highlights
Elevator ads may occupy limited physical space, but their “enclosed, high frequency exposure” makes them exceptionally effective.
In today’s diversified marketing landscape, elevator advertising—thanks to its “close to the heart, unmissable path” advantage—has become a vital channel for brand promotion. Before launching a campaign, advertisers often ask: What are the standard elevator ad dimensions? This article dives into four key areas—common sizes, format differences, selection principles, and design guidelines—to help you maximize every square centimeter of impact.

1. Common Elevator Ad Dimensions 📏
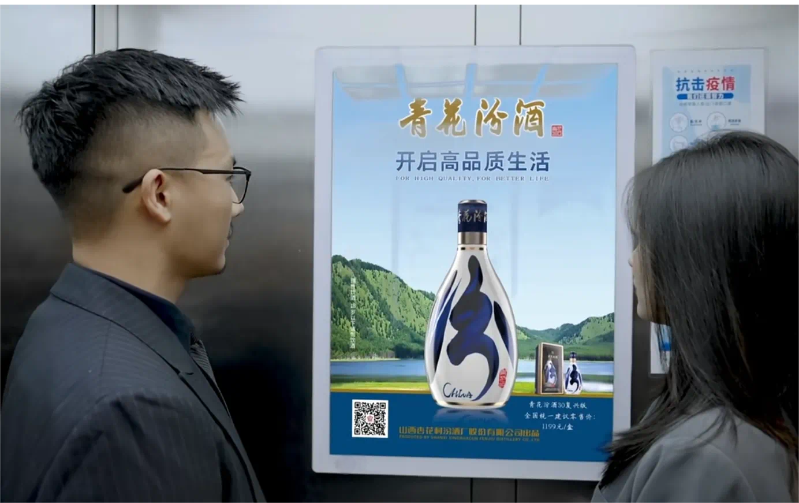
- Door‑Frame Lightbox
- Standard Size: 600 mm × 1,200 mm (60 cm × 120 cm)
- Usage: High‑end residential buildings and premium office towers. Enclosed backlit frame ensures visibility at night.
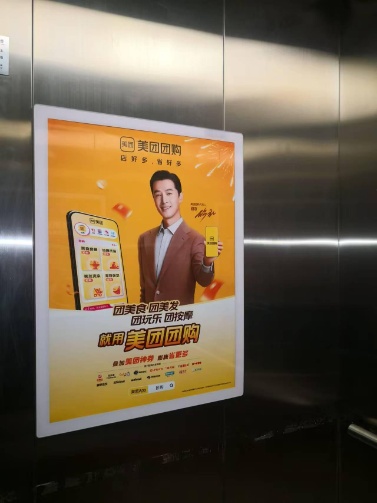
- Interior Car Poster
- Standard Sizes:
- 550 mm × 1,600 mm (55 cm × 160 cm)
- 500 mm × 1,400 mm (50 cm × 140 cm)
- Usage: Subway elevators and shopping‑mall elevators. Printed posters that are easy to replace, ideal for short‑term promotions.
- Standard Sizes:
- Overhead Car Top Lightbox
- Standard Size: 300 mm × 800 mm (30 cm × 80 cm)
- Usage: Residential communities and small‑to‑mid‑scale commercial complexes. Mounted above the car ceiling; perfect for logos and concise messages.
- Side‑Wall Car Wrap
- Standard Size: 400 mm × 1,800 mm (40 cm × 180 cm)
- Usage: Hotels and office buildings with abundant elevator ad inventory. Large side panels offer strong visual impact.
2. Format Differences & Size Selection 🎯
- Rectangular Posters
- Narrow‑tall formats (e.g., 55 × 160 cm) are most common—they align with side‑wall dimensions and passenger eye level.
- Square Lightboxes
- 600 × 600 mm (60 × 60 cm) frames beside elevator doors in corridors serve as high‑frequency focal points.
- Combined Panels
- Some installations link two adjacent frames (vertically or horizontally) to create a larger unified display—ideal for immersive brand showcases.
- Custom Shapes
- For uniquely shaped cars or special projects, work with your ad provider to measure actual space and produce tailor‑made frames that maximize coverage.

3. Key Factors for Choosing the Right Size 🔍
- Space & Visual Comfort
- Ads should not obstruct passenger entry/exit or create a cluttered look. Maintain at least 300 mm clearance from door frames and control panels.
- Dwell Time
- Typical elevator rides last 20–40 seconds. Oversized layouts may be hard to read; undersized formats may go unnoticed. Aim to keep primary visuals and copy within the central 50% of the frame height.
- Replacement & Maintenance Costs
- Poster‑stickers are standardized and inexpensive to produce and swap. Lightboxes require professional servicing—best for campaigns longer than one month.
- Brand Positioning & Budget
- Premium campaigns or large events benefit from backlit lightboxes and combined panels (higher cost, greater impact). Local small businesses can opt for poster wraps for flexibility and cost‑control.

4. Design Guidelines & Implementation Tips 💡
- Clear, Concise Visuals
- Limit text to ten words or fewer. Use brand‑consistent colors and high‑contrast imagery to ensure rapid comprehension.
- Golden Sight Zone
- Position logos and key messages within the central 30–60% vertical band of the frame—aligns with natural sightlines.
- Dynamic & Static Mix
- For lightboxes, consider subtle lighting effects or gradient backgrounds to guide attention. Static posters can feature a QR code for interactive engagement.
- Pre‑Launch Dimension Verification
- Confirm frame dimensions with your provider before production. Ensure design files match on‑site measurements to avoid rework.
Elevator ads may occupy limited physical space, but their “enclosed, high‑frequency exposure” makes them exceptionally effective. By mastering standard dimensions, understanding format differences, and applying strategic design principles, you can ensure each elevator campaign delivers maximum impact during its brief window of attention.


